ANOTHER HAPPY CUSTOMER - TR4A ENGINE REBUILD
Midway through 2023, a lovely couple from Scotland wanted us to help them out by carrying out a full engine rebuild on their beloved Triumph TR4A. The vehicle had suffered with a suspected head gasket failure, showing signs of contaminated oil. When they brought the car down to us, we gave them a tour around the site to see all of the different types of work we carry out here at TRGB. This gave them reassurance for the work we were about to complete. We always ensure the customer is at the forefront of decision making, from small aspects like colour of the block to more important decisions for example, whether they want electronic ignition fitted or other recommended upgrades. Along with this we always like to keep the customer up to date with the overall progress of the build. (Here is the car before any work was started)

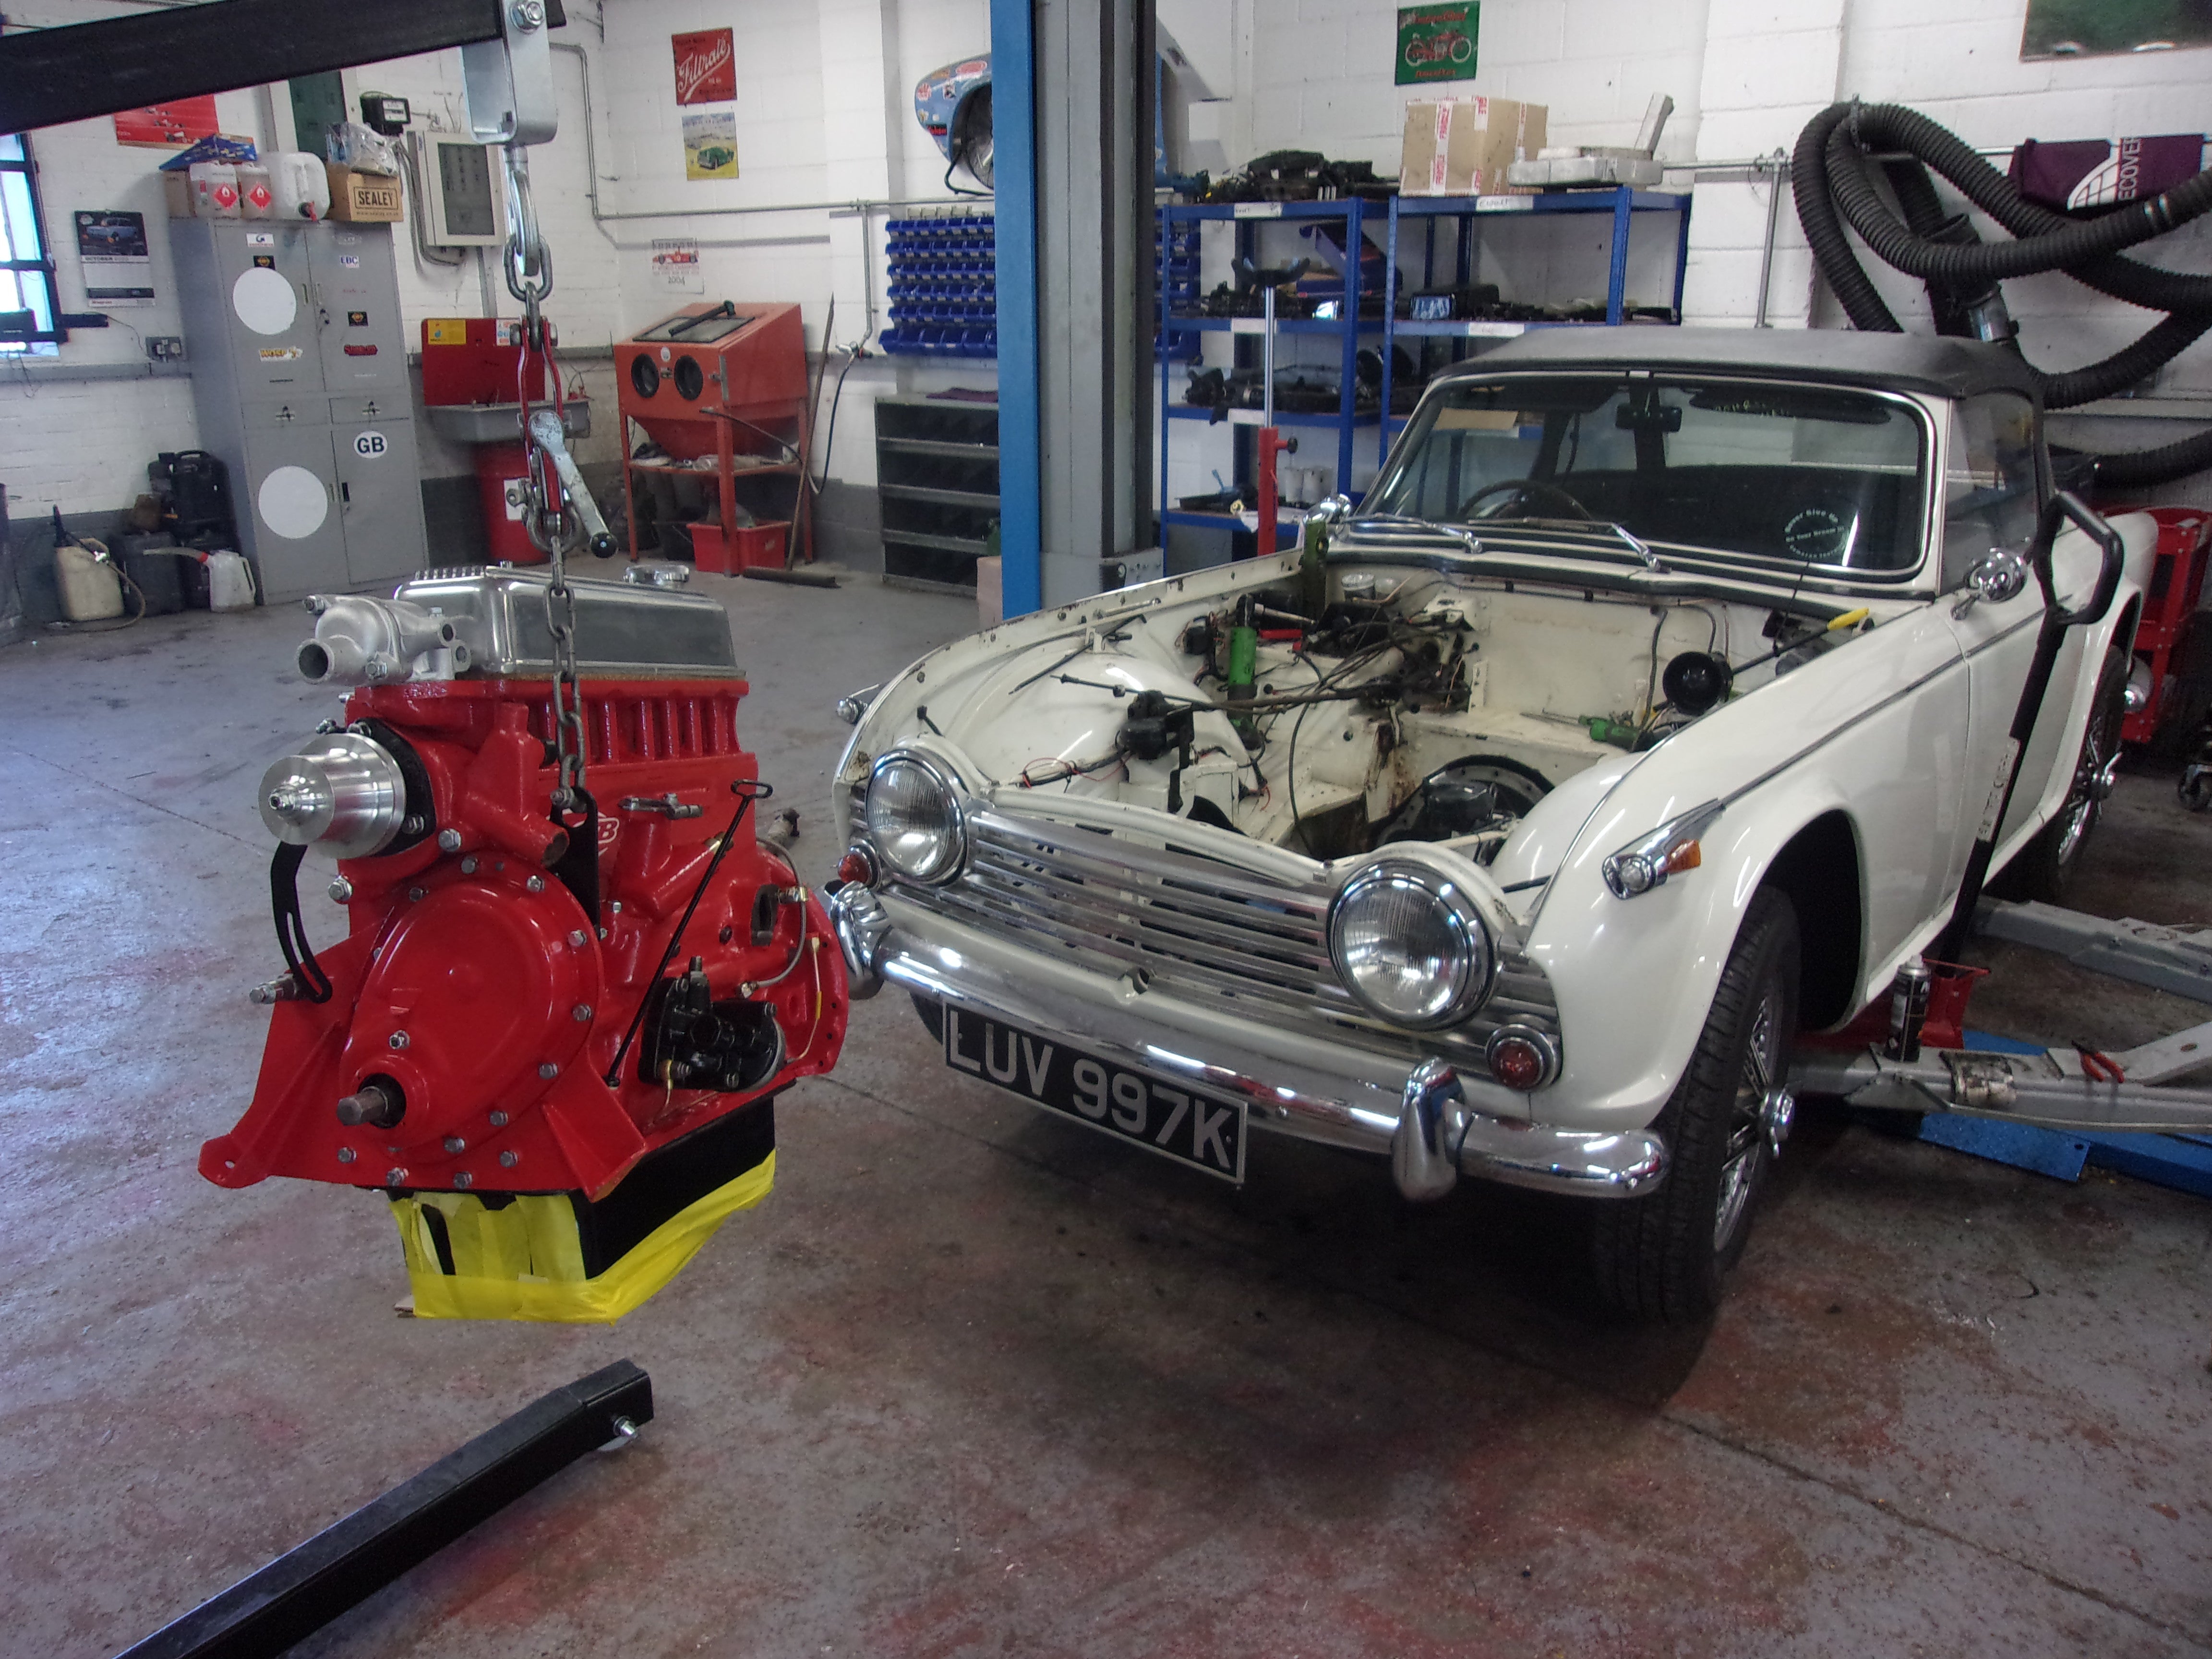
The first stage of any engine rebuild we complete, when having the vehicle on site, is to safely remove the engine from the car. Firstly, removing the bonnet and storing that in a safe place ready for refitting at the end of the process. Secondly, all ancillaries, which could catch on the body, are removed from the engine along with disconnecting any wiring, heater pipes and the gearbox housing. (You can see the engine being removed below)


Once the engine is out of the vehicle it is then put onto an engine stand for a full strip down. The rest of the ancillaries are removed so that we are left with a completely bare block. At this stage we can send the critical engine components away to a machine shop. (Engine on stand being stripped down before and after)


The machine shop collected the block, crankshaft, main bearing caps, flywheel, cylinder head, new pistons and liners and clutch cover to begin their machine work and balancing. While at the machine shop, the engine is fitted with cam bearings, and the little end bushes are fitted to the conrods. The engine came back to us after having been machined flat on all necessary surfaces as well as chemically cleaned, with the cylinder head also being converted to unleaded. (The block and the other parts as soon as they arrive back to us)


Before we started fitting the engine back together, we made sure the block is painted, in the colour the customer specified. This protects the block from going rusty as well as giving it a nice clean finished look when reinstalled. This customer chose to have a red block with a black sump. Whilst the engine was away for machining, the parts of the engine we reuse, such as the front plate, sump pan, water pump housing and thermostat housing were cleaned up and repainted. The carburettors were also cleaned out on this vehicle, using a sonic bath. New gaskets, seals and washers were fitted upon reassembly, ready to go onto the vehicle once installed back into the car. (Carb cleaning)

Once the block was painted and dry, installing the new parts could begin. First of all, half of the rear main seal is installed, bolting on to the rear of the block. The crankshaft is laid onto its new main bearings and the tolerance is tested using plasti-gauge. The results are analysed before continuing the rebuild making sure the tolerance is correct. Thrust washers are then installed to ensure the end float of the crank is within manufacturers tolerances. Here at TRGB we prefer the tolerance to be at the tighter end of the scale for when then engine runs in. Assembly lube is applied to the face of the bearings before the main bearing caps are tightened down to their correct torque settings. (Crankshaft installation)

More measurements are then checked with the piston rings and liners to ensure the rings are within working tolerance. All rings, gudgeon pins and circlips are installed ready for the piston to be lowered into the liners once they have been set down on top of the steel figure eight gaskets and pretreated with oil. The big end bearings and caps are then installed and torqued to specification. At this point the crankshaft in turned to ensure the tolerances and movement is tight enough, but not too tight. The oil pump is then installed before the sump pan is refitted with threebond gasket sealant and new gasket. The front plate is then installed, and the high torque camshaft is slid into place, again with assembly lube to ensure free movement on first start up. Because this engine was fitted with a high torque camshaft, 89mm pistons, and modified cylinder head, we then fitted a vernier cam pulley to finesse the timing on this uprated engine build. The high torque camshaft which provides a longer valve duration than factory spec ensuring that it has enough torque throughout the rev range. (Measurements and front plate installation)


With both the crank and camshaft pulleys in place, the timing chain is installed, tensioned and the unit is timed correctly. The front cover is then installed, followed by the water pump and it’s housing. Cam followers are dropped into position on top of the cam lobes before the cylinder head is installed. The head studs are then set into their correct locations in the block before the cylinder head is laid down onto a high-quality composite head gasket that is covered in wellseal. The cylinder head is already setup with valves, springs, caps and collets from its work at the machine shop. New head washers and nuts are then installed, being torqued down to factory settings across the cylinder head. (Torquing the head studs down)


A new rocker shaft assembly can then be installed, and the tappet gap clearance measured and set before fitting the aluminium rocker cover. Further ancillaries on the side of the block are installed including the oil filter housing, rockershaft oil feed pipe, alternator and then finally the bottom pulley and extension. (Fitted up block)


The customer had asked for many minor improvements to be made while the engine was out of the car. He had chosen for the car to have a brake servo fitted, which we fitted on the passenger side of the vehicle, running new copper brake lines neatly across the bulkhead. The exhaust manifold was also wrapped to reduce heat transfer to the brand-new high torque starter motor. An electronic ignition kit was fitted inside the distributor and solid steering rack mounts installed to create a more positive driving experience. (Newly fitted extra parts)


The engine was now ready for installation. It is always a careful balancing act installing a block into these vehicles, making sure the splines get lined up with the gearbox for a smooth installation. This can often be a two-person job, raising and lowering both the engine and gearbox to ensure proper coupling. Once installed, bolted onto the bell housing and engine mounts, the cross brace is fitted, and the mechanical fan is finally fitted. A newly reconditioned radiator is a must with a newly built engine, and we advised fitting this with an auxiliary Revotec fan kit, with an adjustable fan thermostat. The reconditioned carburettors are then refitted along with new fuel lines and inline fuel filter. The last of the auxiliary items are fitted, such as HT leads, fuel pump, electrical connections, and oil filter. Coolant and oil are filled with their levels being checked once the car has been run for the first time. (Final install pictures)


Once we get the car up and running and have the bonnet refitted, we are then able to road test the vehicle to make sure that the carbs are tuned correctly to get the best performance throughout the rev range. Finally, the car got a complimentary wash and wax before the customer came to collect their pride and joy.

If this is something that your classic car is in need of, or you know someone who is looking for an engine to be rebuilt. We are more than happy to undertake this and any other work you may have on your classic car.